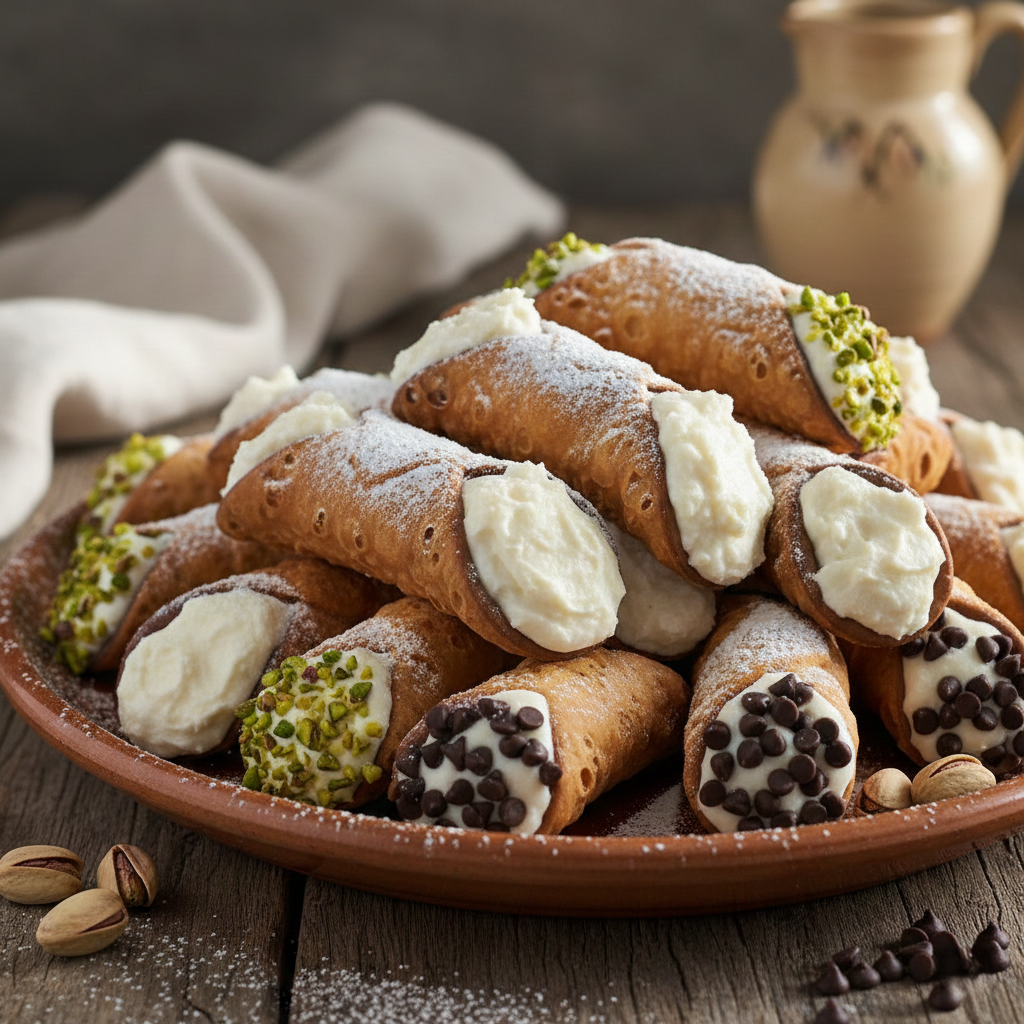
There is perhaps no pastry more iconic, more celebrated, and more dangerously delicious than the Cannoli Siciliani. Imagine picking up a delicate, golden-fried tube. It feels light yet substantial in your hand. You take a bite, and the world stops for a second. Crunch.
The shell shatters—a crisp, blistered, slightly cocoa-kissed pastry that gives way instantly to a cloud of sweet, velvety ricotta cheese.
The contrast is absolute perfection. The snap of the fried dough meets the lush creaminess of the filling, while hints of dark chocolate and the subtle warmth of Marsala wine dance on your palate.
This isn’t just a dessert; it is a Sicilian celebration on a plate. While many rely on soggy, pre-made bakery versions, mastering the art of the fresh, homemade cannoli is a superpower. Today, we aren’t just making cookies; we are crafting a masterpiece.
Why You Need This Recipe
Let’s be honest: store-bought cannoli are often a disappointment. By the time you buy them, the shell has absorbed the moisture from the cheese, turning that glorious crunch into a chewy, cardboard-like texture. This recipe changes everything.
The “crave factor” here is undeniable. We are talking about fresh, fryer-hot shells that are crispy and airy, filled only seconds before eating. This recipe brings the authentic Italian bakery experience into your home kitchen. Whether you are looking to impress guests at a dinner party or simply want to treat yourself to a weekend project, the satisfaction of rolling, frying, and filling your own cannoli is unmatched. It is indulgent, it is messy, and it is absolutely worth every calorie.
A Taste of History and Culture
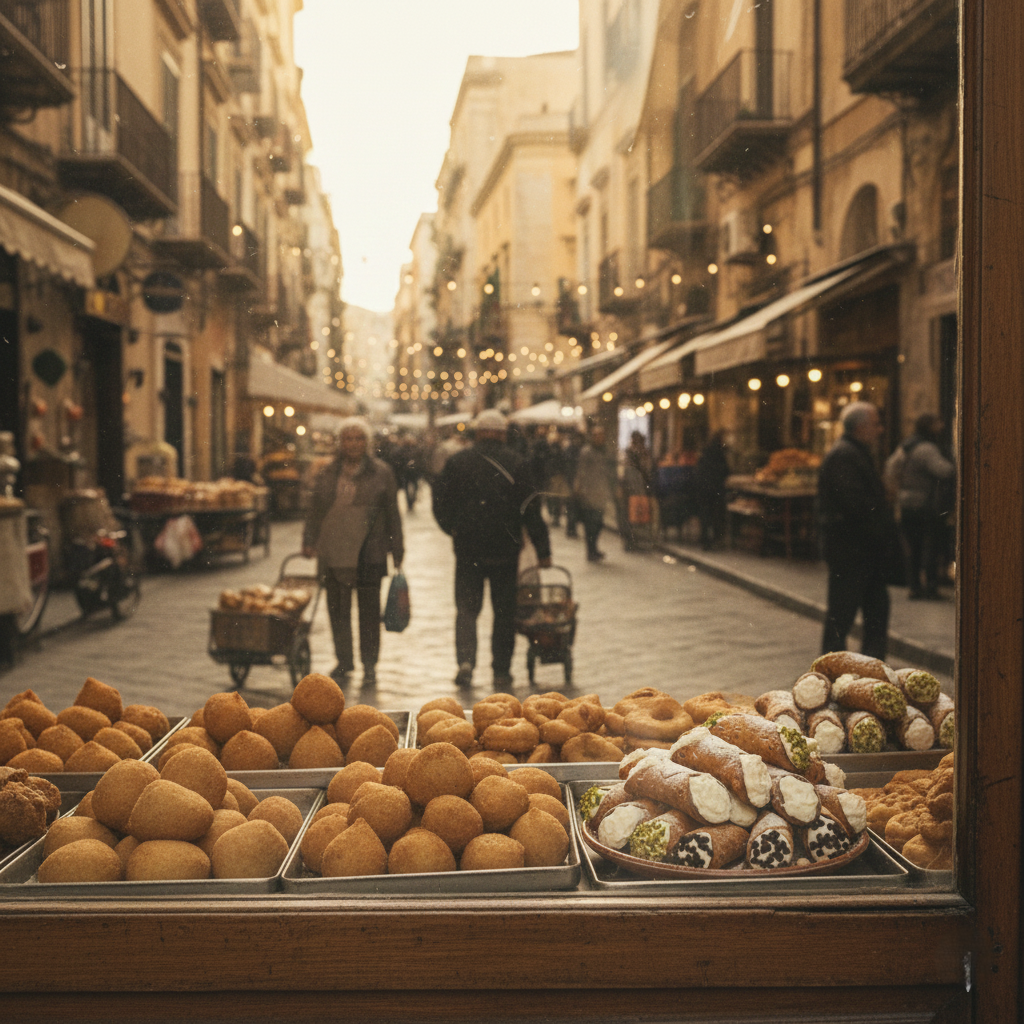
To make a cannoli is to step back into the vibrant, chaotic history of Sicily. The island has been a melting pot of cultures for millennia, and this pastry reflects that heritage perfectly.
Historians trace the origins of the cannoli back to the Arab rule of Sicily. The Arabs introduced sugar cane, citrus fruits, and the technique of deep-frying sweets to the island. The addition of cocoa and spices came later, evolving the recipe into what we know today.
Traditionally, cannoli were a seasonal treat prepared specifically for Carnevale, the festive season leading up to Lent. It was a time of excess, parades, and indulgence, and nothing says “party” quite like a tube of fried dough stuffed with sweetened cheese. Over time, the demand for these treats became year-round (thankfully for us). By making this dish, you aren’t just baking; you are participating in a centuries-old tradition of Italian hospitality and joy.
The Science of the Crunch
Beyond the taste, this recipe offers incredible culinary value by teaching you the science of pastry frying.
- The Blisters: You will notice authentic cannoli shells have a bubbly, blistered surface. This isn’t an accident; it’s chemistry. The acidity in the Marsala wine (and a touch of vinegar) reacts with the baking soda and the heat of the oil to create tiny pockets of carbon dioxide, puffing the dough instantly upon contact with the heat.
- The Ricotta: We will learn the importance of straining. Ricotta is a whey cheese, meaning it holds water. If you don’t drain it, your filling will be runny. We want a filling that is stiff enough to stand up on its own.
- Cost-Effectiveness: A single high-quality cannolo at a bakery can cost upwards of $5.00. This batch makes roughly 12–15 for a fraction of the price, using staple pantry ingredients.
Creating the Masterpiece
This recipe is broken down into two main components: the Scorza (the shell) and the Crema (the filling).
Equipment Needed
- Cannoli Tubes: Stainless steel or aluminum tubes (essential for shaping).
- Large Pot or Dutch Oven: For deep frying.
- Deep-Fry Thermometer: Crucial for maintaining oil temperature.
- Stand Mixer or Large Bowl: For the dough.
- Rolling Pin or Pasta Machine: To get the dough paper-thin.
- Cheesecloth or Fine Mesh Sieve: For straining the ricotta.
- Round Cutter: About 3-4 inches (8-10 cm) in diameter.
- Piping Bag: With a large round tip (or a zip-lock bag with the corner cut).
Ingredients
For the Shells (Scorza):
- 2 cups (250g) All-purpose flour
- 2 tbsp (30g) Granulated sugar
- 1 tsp (5g) Unsweetened cocoa powder (adds color and depth, not chocolate flavor)
- ¼ tsp Salt
- 2 tbsp (30g) Unsalted butter, cold and cut into cubes
- ½ cup (120ml) Marsala wine (Dry is best)
- 1 tsp White wine vinegar (helps create bubbles)
- 1 Egg (white separated from yolk; use yolk in dough, reserve white for sealing)
- Vegetable or Canola Oil for frying (about 1 liter/quart)
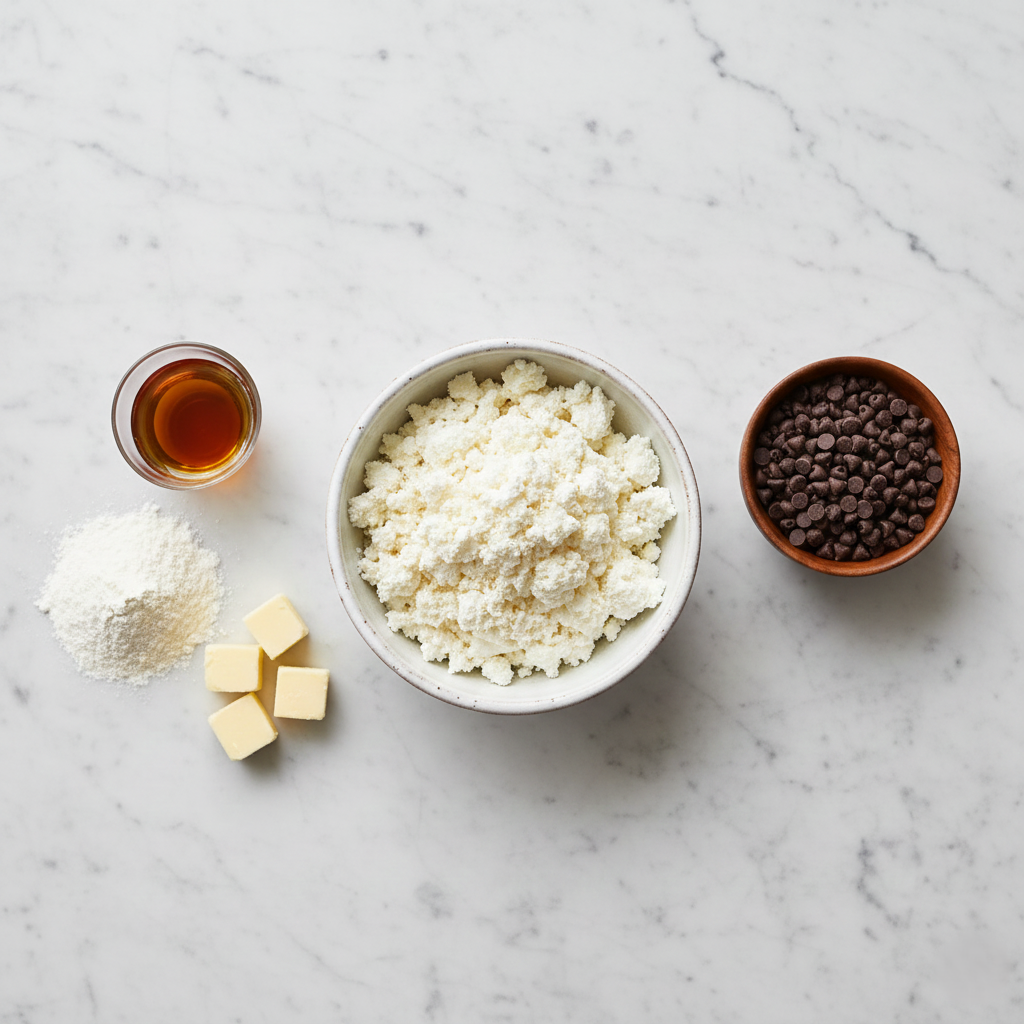
For the Filling (Crema):
- 2 cups (500g) Whole milk Ricotta cheese (Sheep’s milk is traditional, Cow’s milk is fine)
- ¾ cup (90g) Powdered sugar (confectioners’ sugar), sifted
- ½ cup (80g) Mini semi-sweet chocolate chips
- Optional: ¼ cup chopped pistachios or candied orange peel for garnish
- Extra powdered sugar for dusting
Step-by-Step Instructions
Phase 1: The Shell Dough
- Mix Dry Ingredients: In a large bowl or food processor, combine the flour, sugar, cocoa powder, and salt.
- Cut in the Fat: Add the cold, cubed butter. Use your fingers to rub the butter into the flour until the mixture resembles coarse wet sand. There should be no large chunks of butter remaining.
- Wet Ingredients: Add the egg yolk (save the white!), Marsala wine, and vinegar. Mix until a shaggy dough forms.
- Knead: Turn the dough onto a lightly floured surface. Knead for about 5 to 7 minutes. The dough should be smooth, elastic, and firm. If it feels too wet, add a sprinkle of flour; too dry, a drop more wine.
- Rest: Wrap the dough tightly in plastic wrap and let it rest at room temperature for at least 1 hour. Note: This relaxes the gluten, preventing the dough from shrinking back when you roll it.
Phase 2: The Ricotta Filling (Do this while dough rests)
- Strain the Cheese: This is the most critical step. Place the ricotta in a sieve lined with cheesecloth over a bowl. Place a weight on top (like a heavy can) and let it drain in the fridge for at least 30 minutes (overnight is even better).
- Whip: Discard the liquid whey. Place the drained ricotta in a bowl. Sift the powdered sugar over it. Fold gently or whip briefly until smooth and creamy. Chef’s Tip: Do not over-beat, or the cheese will become runny.
- Add Mix-ins: Gently fold in the mini chocolate chips.
- Chill: Cover and refrigerate until ready to fill.
Phase 3: Rolling and Shaping
- Roll Thin: Cut the dough into four pieces. Work with one piece at a time (keep others covered). Using a rolling pin or pasta machine, roll the dough out until it is paper-thin (about 1-2mm). You should almost be able to see the texture of the counter through it.
- Cut: Use your round cutter to punch out circles. Gather scraps and re-roll.
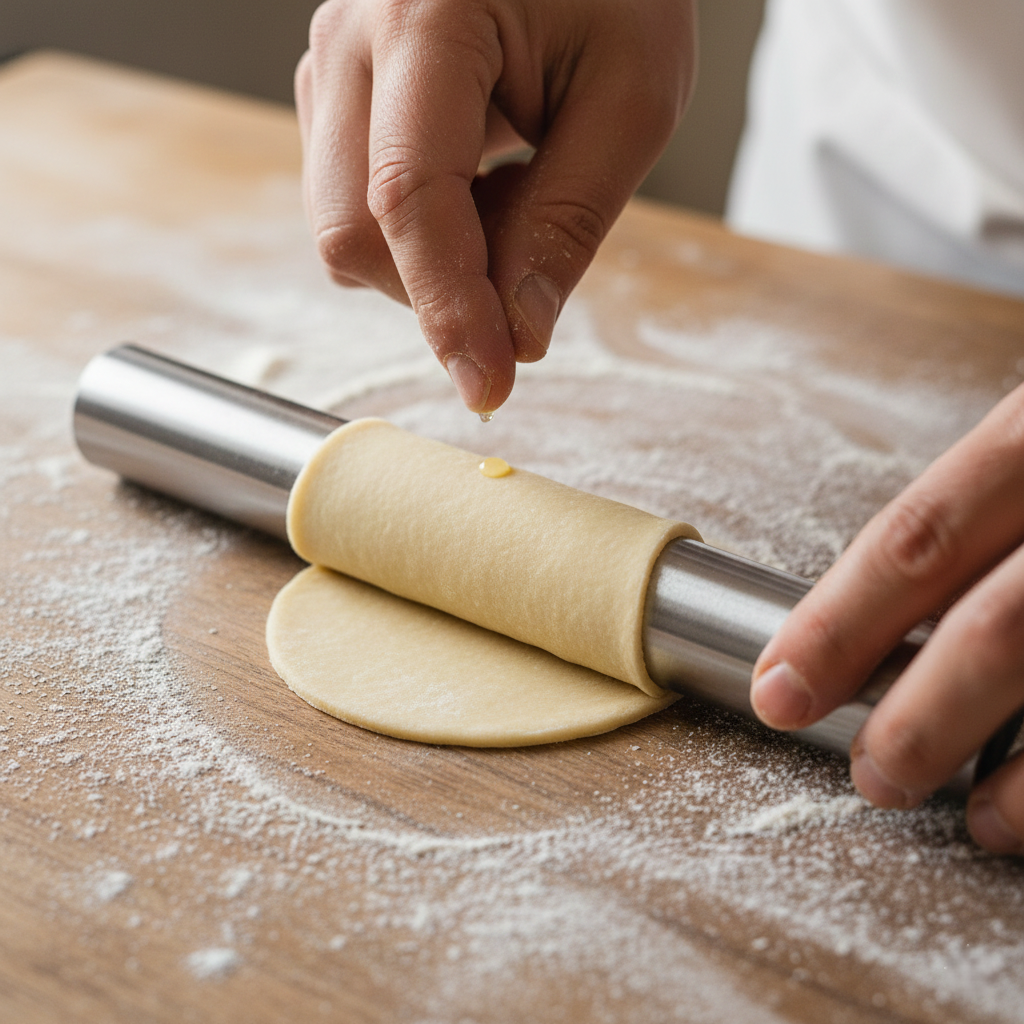
- Wrap: Take a circle of dough and stretch it slightly into an oval. Wrap it loosely around a metal cannoli tube.
- Seal: Dip your finger in the reserved egg white and dab it on one edge of the dough. Overlap the other edge on top and press firmly to seal. Crucial: Do not get egg white on the metal tube, or the shell will stick to the metal later.
Phase 4: The Fry
- Heat Oil: In your heavy pot, heat the oil to 350°F (175°C). Use your thermometer! If the oil is too cool, the shells will be greasy; too hot, they will burn before bubbling.
- Fry: Carefully lower 2-3 tubes into the oil. Do not overcrowd.
- Watch the Magic: Fry for about 1–2 minutes. You will see blisters forming immediately. Turn them gently with tongs until they are a deep golden brown.
- Drain: Remove and place on paper towels.
- Remove Tubes: Wait about 1-2 minutes until they are cool enough to handle but still warm. Grip the shell gently with a paper towel and twist the metal tube to pull it out. Warning: The metal retains heat longer than the dough!
Phase 5: Assembly
- Fill: Transfer the ricotta cream to a piping bag. Insert the tip halfway into one end of the cooled shell and squeeze while pulling out. Repeat on the other end to ensure the shell is full.
- Garnish: Dip the exposed cream ends into chopped pistachios, more chocolate chips, or garnish with a strip of candied orange peel.
- Dust: Heavily dust the tops with powdered sugar.
- Serve: Eat immediately!
Chef’s Tips for Success
- The “Wine” Factor: Don’t skip the Marsala. The alcohol evaporates quickly during frying, leaving behind a crisp texture that water simply cannot achieve.
- Thin is In: If your shells are chewy rather than crispy, you didn’t roll the dough thin enough. It needs to be translucent before frying.
- The Soggy Bottom Blues: Never, ever fill the cannoli until your guests are ready to eat. The moisture from the ricotta will penetrate the shell within 30 minutes, destroying that perfect crunch.
Frequently Asked Questions
Can I make the shells in advance?
Absolutely! You can fry the shells up to 2 days in advance. Store them in an airtight container at room temperature lined with paper towels to absorb any excess moisture. Do not refrigerate the empty shells, or they will soften.
Why did my shells open up in the fryer?
This usually happens for two reasons: either the seal wasn’t pressed firmly enough, or you got egg white on the metal tube, causing the dough to stick to the tube and pull apart as it expanded. Ensure a clean seal!
Can I substitute the ricotta with cream cheese?
Technically, you can, but it won’t be a Cannolo Siciliano. Cream cheese is heavier, tangier, and denser. Ricotta provides a lighter, grainier texture that is signature to this dessert.
What if I don’t have cannoli tubes?
In a desperate pinch, you can fashion tubes out of heavy-duty aluminum foil rolled into tight cylinders (about 1 inch in diameter). However, be very careful as foil can crush easily when handling hot dough.
How do I get the chocolate chips to show on the ends?
Mix most of the chips into the filling, but save a handful. After piping the cream into the shells, press fresh chips onto the exposed cream at both ends for that bakery-perfect look.
Conclusion
There is a moment of silence that happens when you serve a platter of homemade Cannoli Siciliani. It’s the silence of pure enjoyment. The dark, blistered shells dusted with snow-white sugar look stunning, but the taste is what lingers in the memory.
By making these from scratch, you have conquered the fear of deep-frying and mastered a dough that has delighted people for centuries. So, pour a glass of Marsala, gather your friends, and enjoy the sweet, crunchy, creamy rewards of your hard work. Buon Appetito!